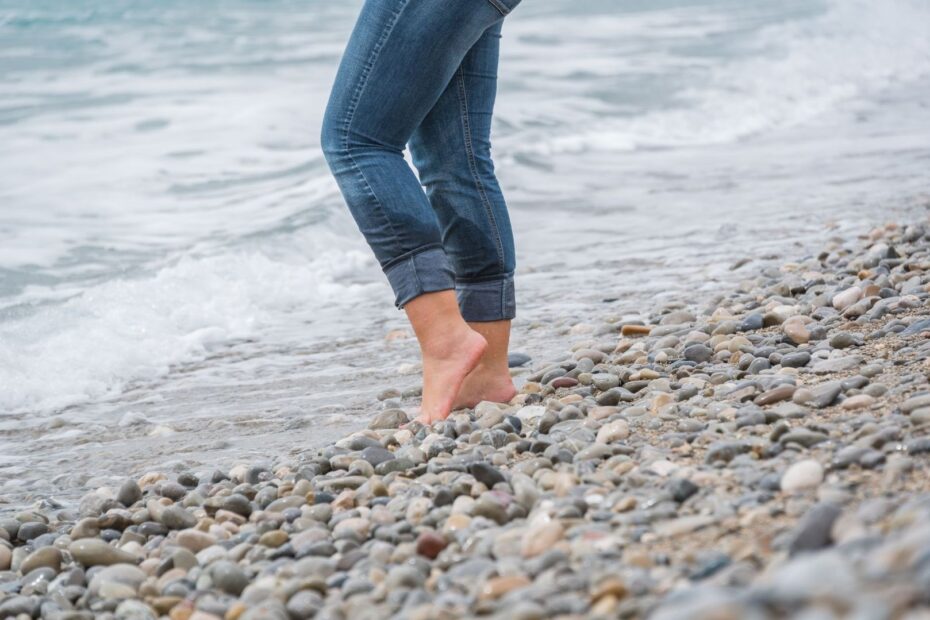
The Shifting Shoreline and the Physical Cost of Shingle
Coastal pebble berms and scree embankments demand a different walking strategy from a hard-packed trail. On firm ground, much of the force generated by each step is returned through the surface, helping carry the body into the next stride. On rounded shingle, stones roll, slide and settle beneath the boot. The surface absorbs part of that energy, while the foot must constantly correct for small changes in angle and height. A long-distance walker can therefore feel unusually tired after a relatively short distance, particularly through the calves, ankles, hips and lower back.
The difficulty is not simply that the ground is uneven. It is that the support point changes during the step. A familiar heel-to-toe gait may produce a long landing phase, a forward skid or a sudden twist as the gravel moves away. That pattern encourages overstriding and forces the ankle to stabilise the body after contact rather than before it. Learning to read the shape of the berm is part of the solution. A classic shingle beach shows how wave action concentrates loose, rounded stones into distinct coastal bands, and those bands can differ greatly in firmness. Shorter steps, deliberate cadence, broad weight distribution, a level pelvis and careful route selection allow forward progress without treating every footfall as a contest with the ground.

Understanding Energy Dissipation and Joint Mechanics on Loose Scree
On stable terrain, the foot can act as a relatively predictable lever. On loose scree, the support surface moves sideways or sinks under load, so the lower leg must make rapid corrections. The peroneal muscles on the outside of the lower leg help resist excessive outward rolling, while the calf, intrinsic foot muscles and deeper ankle stabilisers respond to changes in pressure. These corrections are small, but they occur repeatedly. Over several hours, the accumulated demand can become more significant than the effort of climbing a modest gradient on firm ground.
A sideways slip also changes the relationship between the ankle, knee and hip. If the outer edge of the boot drops unexpectedly, the ankle may move quickly into inversion, placing strain on the lateral ligaments. If the foot collapses inward on a sloping or unstable band, repeated eversion can overload the supporting tissues and alter the position of the knee and pelvis. Previous sprains are especially relevant because chronic ankle instability can involve reduced proprioception, strength and postural control. Research and clinical guidance from this Authoritative Source emphasise that the problem is not confined to the ankle; hip control, particularly the gluteus medius, helps limit lateral sway and keeps the centre of gravity within the base of support. A useful overview of these mechanisms is available through this biomechanical study on gluteus medius activity and ankle stability.
Loose pebble ridges also differ from soft sand. Sand usually deforms beneath the whole foot, whereas deep shingle can move in several directions and may contain voids between stones. The result is less predictable force absorption and a greater need for active balance. A practical comparison is shown below.
| Surface | Typical response | Main physical demand |
|---|---|---|
| Hard-packed path | Stable support with efficient force return | Normal propulsion and impact management |
| Firm wet sand | Moderate deformation with broad contact | Increased calf and hip work |
| Dry soft sand | Foot sinks and propulsion becomes less efficient | Higher metabolic cost and shorter effective stride |
| Deep unconsolidated shingle | Rolling, sliding and irregular sinking | Continuous ankle correction and reduced forward return |
These differences explain why fatigue may arrive before obvious cardiovascular strain. The stabilising muscles are working continuously, but the effort is dispersed through many small corrections rather than one obvious climb. If ankle control begins to deteriorate, reduce distance on the loose section, change to a firmer line or stop for a short reset. Pain, swelling, limping or a feeling that the ankle is repeatedly giving way should not be treated as normal trail fatigue.
Essential Gait Adjustments to Preserve Momentum and Protect Ankles
The most effective adjustment is usually to shorten the step while increasing the rhythm slightly. A long stride places the landing foot far ahead of the centre of mass, creating a braking force and increasing the chance that the heel will skid when stones shift. Short steps keep the foot closer beneath the body and reduce the amount of sideways movement that must be corrected. The aim is not to hurry. It is to maintain a quiet, repeatable cadence that lets each footfall settle before the next one arrives.
A midfoot landing is often more adaptable than a pronounced heel strike. The whole sole can accept load progressively, spreading pressure over a larger contact area and allowing the ankle to make a controlled adjustment. The landing should remain soft rather than forced. Keep the knees slightly unlocked, allow the arms to balance naturally and use a small forward hinge from the ankles and hips. The pelvis should remain level instead of dropping towards the downhill side. Light core engagement helps keep the centre of mass over the supporting foot, while a stable hip reduces the lateral sway that can provoke an ankle roll.
Use the following checklist when stepping into a loose pebble bank.
- Scan the next two or three steps. Identify larger, partially embedded stones, avoid obvious hollows and choose a line that does not require sudden changes of direction.
- Reduce stride length before the surface changes. Do not wait for the first slip to shorten the step. Lower the body slightly by softening the knees and keep the feet close to the ground.
- Place the midfoot quietly. Set the sole down beneath the hips, allow the stones to settle and transfer weight gradually rather than stamping down.
- Reset when alignment deteriorates. If the pelvis tilts, the ankle feels unstable or the cadence becomes irregular, pause on firmer ground, adjust footwear and reassess the route.
Reading the Berm and Micro-Route Selection Across Sorted Stone
Wave action commonly creates bands with different stone sizes, moisture levels and degrees of compaction. The upper berm may contain larger, drier cobbles that move readily underfoot, while lower areas closer to the water can contain smaller or wetter material. Conditions vary with tide, recent weather and storm activity, so no single line is reliably firm on every beach. In many situations, a compacted wet margin offers better footing than a high, loose crest, but the waterline must be judged carefully and never approached at the expense of tidal safety.
Look for changes in texture rather than following the most visually direct route. A continuous contour across a slightly lower, firmer band may preserve momentum better than repeated climbs onto the ridge crest and slides back down. On a cross-slope, keep the feet more across the slope than pointed directly downhill, reduce the step length again and avoid allowing the downhill foot to land on a rounded stone at the edge of the bank. If a small slump begins, stop moving forward, widen the stance and step back or diagonally onto more stable material. Route decisions should account for the whole stage, including the energy required to leave the beach and regain a path.
- Prefer embedded or tightly packed stones over loose piles with visible gaps.
- Use damp, compact material when it is safely above the active wave reach.
- Avoid steep slopes where every step pushes material downhill.
- Cross unstable bands at a slight diagonal rather than attacking the steepest line.
- Reassess after high water, storms or significant changes in beach profile.
Conditioning and Footwear Preparation for Sustained Coastal Trekking
Preparation should target the complete lower kinetic chain. Calf raises, controlled heel lowering and gentle single-leg balance can improve the ability to manage repeated ankle corrections. Exercises such as short-foot holds, arch lifts, towel scrunches and slow toe walking develop the intrinsic foot muscles that help maintain a stable platform. Side steps with a resistance band and supported single-leg reaches add hip control, while gentle plantar fascia rolling may relieve tension after training. Begin with controlled movement and increase volume gradually, especially if there is a history of sprains, tendon pain or persistent arch symptoms.
Footwear should be chosen for the actual route rather than for appearance or maximum stiffness. A boot with moderate torsional rigidity can reduce excessive twisting, while a secure heel counter and supportive upper help prevent the foot from sliding inside the shoe. A higher collar may offer useful containment for some walkers, but it cannot replace proper lacing or active ankle control. The sole should have a tread that grips mixed surfaces without making the foot feel perched on tall, unstable lugs. Gravel gaiters are valuable on long shingle sections because small stones entering the shoe can alter pressure distribution and encourage compensatory movement.
Before reaching the coast, spend five to ten minutes preparing the stabilisers. Walk slowly on firm ground, perform ankle circles, complete several controlled calf raises and practise gentle single-leg balance near a secure support. Add a few side steps and shallow knee bends to wake the hip muscles. Warm-up guidance from UCSF injury-prevention advice supports gradual preparation, appropriate footwear and progressive increases in activity. Replace worn footwear before the tread or heel becomes uneven, and avoid using unfamiliar boots for the first time on a remote coastal stage.
Training should also reproduce the demands of the route in manageable doses. Begin with short sections of loose gravel, then combine them with normal trail walking. Record how the ankles feel later that day and the following morning, since delayed soreness can reveal that distance or instability has been increased too quickly. Any previous significant sprain, unexplained swelling, sharp pain or persistent sense of giving way warrants assessment by a qualified clinician before undertaking a long exposed stage.
Step Confidently Across the Coastline with Refined Mechanics
Efficient shingle walking comes from combining several modest changes rather than searching for one special technique. A shorter cadence reduces braking and shearing, a midfoot landing spreads load, and a level pelvis keeps the centre of mass closer to the supporting foot. Careful scanning then links those mechanics to the terrain, allowing the route to follow firmer sorted bands instead of forcing a direct line across the deepest stones.
With practice, a difficult pebble ridge becomes less of an endurance ordeal and more of a technical rhythm. Keep the steps quiet, let the surface settle, and treat early ankle fatigue as useful information rather than a challenge to ignore. Planned pauses, appropriate footwear and realistic stage distances protect stamina for the next stretch. The coastline will remain changeable, but deliberate movement and patient terrain reading give you a reliable way to meet it with greater control and confidence.