
Understanding South Devon’s Most Dramatic Trail Transitions
The walk from Salcombe to Dartmouth is best understood as a sequence of demanding coastal environments rather than one uninterrupted 20-plus-mile effort. The South West Coast Path moves from the sheltered water of the Salcombe ria to open headlands, then across the shingle barrier of Slapton Sands before returning to high coastal pasture and the wooded edges of the Dart. Each zone changes the way the body works, the way weather reaches the walker, and the amount of concentration required underfoot.
That variety is the route’s central challenge and its greatest reward. Across the protected landscapes of the South Hams district, quiet estuaries sit remarkably close to exposed cliffs and restless sea. Treating the corridor as a collection of micro-terrains allows you to spend energy intelligently: conserve strength on sand and shingle, use sheltered sections for recovery, and reserve concentration for the exposed ridges and repeated climbs later in the day.
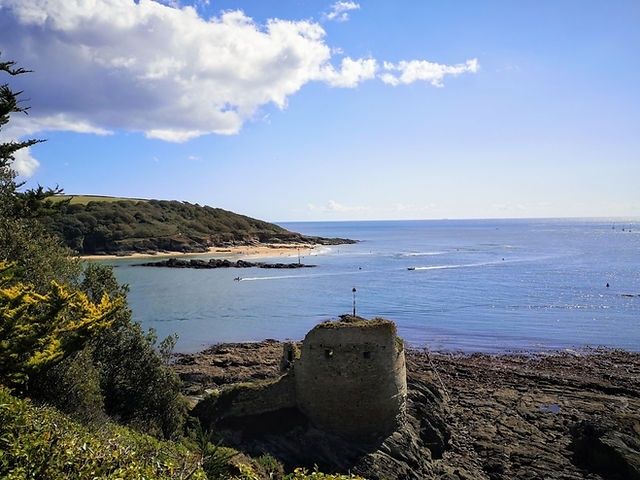
Crossing the Salcombe Ria to East Portlemouth and Gara Rock
The practical start is the foot ferry across the estuary from Salcombe to East Portlemouth, where departure points vary depending on the time of year. During the winter schedule (running from 1 November through 31 March), the ferry departs from Whitestrand Pontoon in the centre of town. During the main spring and summer season (from 1 April through 31 October), departures move to the Ferry Steps at Jubilee Pier, situated next to The Ferry Inn, while Whitestrand is primarily dedicated to the South Sands ferry. The crossing itself takes about five minutes, but it is not a detail to leave until the morning of departure. Services vary seasonally and can be curtailed by extreme low spring tides, adverse weather, or public holidays, so always verify the operational slipway and current timetable with the operator before setting out.
Once across the ria, the path initially feels forgiving. Sheltered woodland, sandy coves and the approaches around Mill Bay create a gentle introduction before the route turns towards more pronounced sea cliffs near Gara Rock. This opening can encourage an overly fast pace, particularly when the estuary views are clear and the path is easy to follow. Resist that temptation. Sand absorbs force and allows the heel to sink, making the calf and Achilles work harder than the mileage suggests.
- Shorten your stride on soft sand and avoid forcing a normal road-walking pace.
- Use firmer margins where access and conservation conditions allow, while staying on the signed path.
- Drink early, because sheltered woodland can hide how quickly effort is accumulating.
- Keep a small reserve for the steeper transitions approaching the open coast.
The terrain changes gradually, which makes the first section useful for establishing a sustainable rhythm. Walk with relaxed shoulders, place each foot deliberately on uneven ground, and take a brief pause before the route becomes fully exposed. Gara Rock is not simply a scenic landmark. It marks the point where protection from the ria gives way to a more serious coastal walking environment, with greater wind exposure, rougher surfaces and fewer obvious opportunities to shorten the day.
Tackling the Exposed Headland Around Start Point
Beyond the quieter coves, the character of the walk becomes more maritime. The headlands around Prawle Point and Start Point are open to rapidly changing weather, and a forecast that looks comfortable inland may not describe conditions on the cliff tops. Wind can arrive in strong gusts across the ridge, while low cloud and rain reduce contrast on rock and make the line of the path less obvious. A sensible weather window matters more here than a rigid mileage target.
High coastal ground also magnifies small foot-placement errors. Slick quartz, slate and weathered rock can be unstable even when the overall path is dry. Keep your centre of gravity low on short scrambles, test questionable footholds before transferring weight, and avoid stepping across wet rock simply to maintain speed. Good footwear with a secure heel and dependable wet-grip sole is more valuable than an excessively heavy boot that encourages fatigue.
The exposure has more in common with the open maritime conditions described in Stepping back in time on Dorset’s Jurassic Coast than with a sheltered estuary stroll. Sudden channel squalls can transform visibility and footing within minutes. Along England’s southern shores, cliffs may face different prevailing winds and geology, but the practical lesson is consistent: check the forecast immediately before departure, carry a waterproof layer where it can be reached quickly, and do not rely on a calm start in Salcombe as evidence that Start Point will be calm.
Navigating the Shingle Ridge of Slapton Ley and Torcross
The descent towards Hallsands introduces another major change in movement. The area carries a strong sense of coastal history, including the remains and memory of the former village, but the immediate walking concern is the transition from firm cliff paths to loose beach material. Shingle is not merely a flatter version of a trail. Flint and chert stones roll underfoot, forcing the ankles to stabilise repeatedly and making forward progress deceptively slow.
Slapton Sands forms a long barrier between the open sea and Slapton Ley, a freshwater lagoon with an entirely different ecological character. The narrow causeway creates a striking contrast: waves, salt spray and open horizons lie on one side, while reed beds, freshwater habitats and calmer margins occupy the other. It is a visually restorative section, but the surface can be biomechanically draining. The steep hump between Beesands and Torcross and the difficult shingle around Slapton Sands are capable of turning a comfortable walking day into a tiring one.
| Terrain zone | Main physical demand | Useful pacing response |
|---|---|---|
| Sheltered ria and woodland | Gradual ascent, soft ground and early enthusiasm | Settle into an easy rhythm and avoid spending energy too soon |
| Rocky headlands | Wind exposure, uneven rock and repeated concentration | Shorten the stride, use secure footholds and allow weather pauses |
| Shingle bank | Rolling stones, ankle stabilisation and slow progress | Accept a lower speed and protect calves and ankles |
| Sheltered estuary and lagoon margins | Relative protection but continued undulating ground | Use the calmer surroundings for food, water and recovery |
Do not judge the route by map distance alone across this barrier. Shingle can demand more effort than a considerably longer stretch of firm path, particularly when carrying a full pack. Trekking poles can provide useful balance, although their tips should be used carefully around other walkers and sensitive habitats. A deliberate, slightly slower pace is usually more efficient than repeated slips followed by forced bursts of speed.
Tactical Stage-Splitting Strategies for Varied Fitness Levels
An athletic two-day itinerary can divide the route around Torcross or Beesands, but it requires strong conditions, an early start and reliable accommodation arrangements. A stage ending at Torcross makes sense because it follows the demanding shingle and lagoon section, allowing the second day to begin with a clearer understanding of remaining climbs. Beesands can also work as a division point, although the distance and transport options must be checked carefully rather than assumed.
A more relaxed three-stage plan gives the terrain the attention it deserves. The first stage can focus on Salcombe, East Portlemouth, Gara Rock and the approach to the exposed headlands. The second can concentrate on Start Point, Hallsands, Beesands and Slapton Ley. The final stage can then cover the coast towards Dartmouth with enough reserve for the sharp climbs after Strete Gate. Public transport in this part of South Devon is limited, so point-to-point planning, accommodation transfers or a pre-arranged base may be more realistic than relying on frequent local buses.
- Confirm the Salcombe to East Portlemouth ferry departure point (Whitestrand in winter; Ferry Steps in summer) and running times before committing to the day’s start.
- Check weather, daylight and the condition of exposed headlands before choosing a long stage.
- Verify accommodation access at Torcross, Beesands or another intended overnight point.
- Allow extra time for shingle, steep undulations and pauses in exposed weather.
- Check every tidal crossing or estuary service with the current operator timetable.
Ferries and tidal crossings are logistical choke points across the wider South West Coast Path, which includes numerous estuary crossings. The 2026 South Devon ferry timetable warns that services may change because of adverse weather and public holidays. The Erme, for example, has no ferry and is generally associated with a low-tide crossing option, while other estuaries have passenger ferries, water taxis or vehicle services with different operating seasons. Never substitute an assumed crossing for a confirmed one, and never attempt a tidal crossing without current local information and a safe margin.
Finishing Strong Along the Dart into Historic Dartmouth
From Strete, the route climbs away from the immediate beach environment through high coastal meadows before descending towards Blackpool Sands. The section described from Beesands to Dartmouth covers about 11.3 miles and is rated moderate, but that label conceals the cumulative effect of repeated sharp climbs and descents. After Strete Gate, the ascent reaches roughly 370 feet, so a tired walker should treat this as a fresh hill rather than a minor final inconvenience.
The path later moves through Stoke Fleming and returns towards the coast at Warren Point, continuing across headlands towards Dartmouth Castle. The approach beside the Dart is a fitting final transition, with the open coast narrowing into a historic estuary and harbour setting. Dartmouth Castle provides a clear visual marker, but the walk is not finished until the harbour area is reached. If continuing to Kingswear, the Dartmouth Lower Ferry carries foot passengers and vehicles across the river on a floating platform pushed by a tug. It operates throughout the year except Christmas Day according to the operator, but check current service and ticketing information before relying on it.
- Refuel before the climb from Strete Gate, rather than waiting for the next descent.
- Use poles on steep grass and uneven downhill sections to reduce braking strain.
- Keep navigation active around Stoke Fleming and the inland detour.
- Allow time for the final harbour approach and the Dartmouth Lower Ferry crossing.
Mastering the Rhythms of South Devon’s Dynamic Coast
This route rewards walkers who divide effort according to landscape. The Salcombe ria offers shelter but includes soft ground and early climbs. Start Point and the surrounding headlands demand weather awareness, secure foot placement and tolerance for exposure. Slapton Sands then replaces rock with unstable shingle, while the final approach to Dartmouth combines high meadows, sharp gradients, woodland edges and estuary scenery.
Before stepping onto the path, check the day’s ferry crossings, weather warnings, tide information and accommodation arrangements. Then set a pace that responds to the ground beneath your feet rather than chasing a fixed hourly average. A slower start, a careful crossing of the shingle and a deliberate reserve for the final hills will usually produce a stronger and safer arrival in Dartmouth than an ambitious pace set in the sheltered streets of Salcombe.